

Creating a garden that feels like a personal oasis can be quite rewarding, and one way to enhance its beauty is through brick garden edging.
As someone who cherishes time spent in the garden, I know how important it is for every corner to feel special and well-organized.
Brick edging offers a timeless charm combined with practicality, helping to define spaces clearly. 🌱

This classic approach not only keeps plants in place but also adds a touch of elegance and structure. Whether you’re aiming for a rustic look or a more polished feel, brick edging provides versatility.
From keeping the grass at bay to highlighting your favorite flowers, brick edging is both functional and aesthetically pleasing. 🌷
JUMP TO TOPIC
1) Classic Red Brick Border
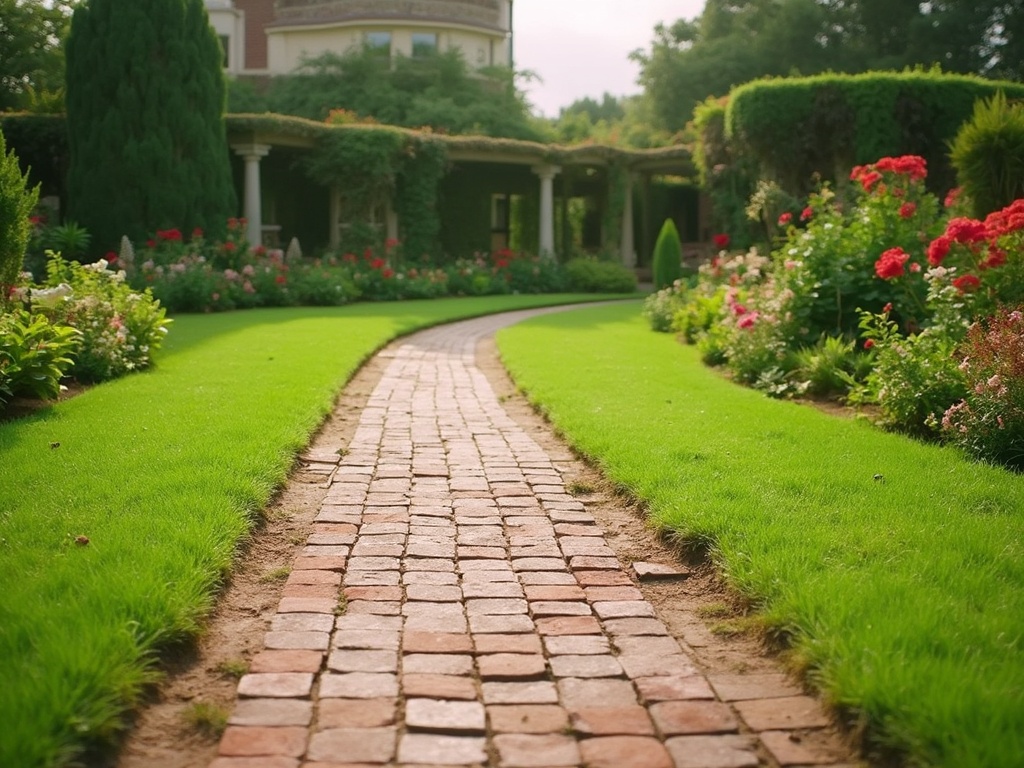
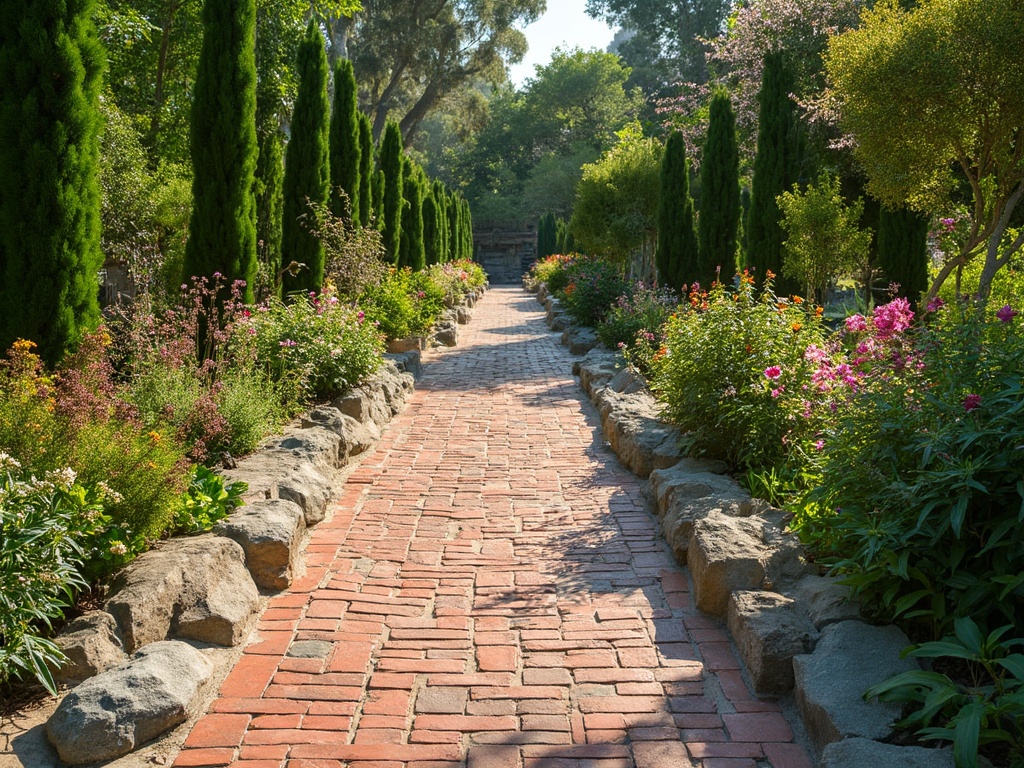
I’ve always found that nothing beats the charm of a classic red brick border. Setting these bricks in your garden is like putting on your favorite old boots—reliable and stylish. 🌷
The vibrant red of the bricks makes the greenery pop, giving your garden a timeless look.
You can lay them side by side for a neat line, or go wild with curves.
Imagine walking down the garden path, bricks crunching underfoot, and enjoying the balance between nature and structure. The robust nature of these bricks makes them perfect for standing up to whatever weather throws their way. 🌱
Depending on your garden’s style, you might want to align them tightly or leave some space for a more rustic feel.
Red bricks come with another perk—they age gracefully. As they weather, they add character to your space. I love how the moss sometimes sneaks up the sides, adding a dash of wild beauty. 🐌 It’s like your garden tells its own story through these bricks.
Here are some quick tips for using them:
- Placement: Choose the edge of your flower beds or garden paths.
- Style: Stack them vertically or horizontally.
- Pattern: Try a basket weave for extra flair.
A classic red brick border never goes out of style, and it’s an easy way to spruce up any garden area! 🍁
2) Herringbone Pattern Edging
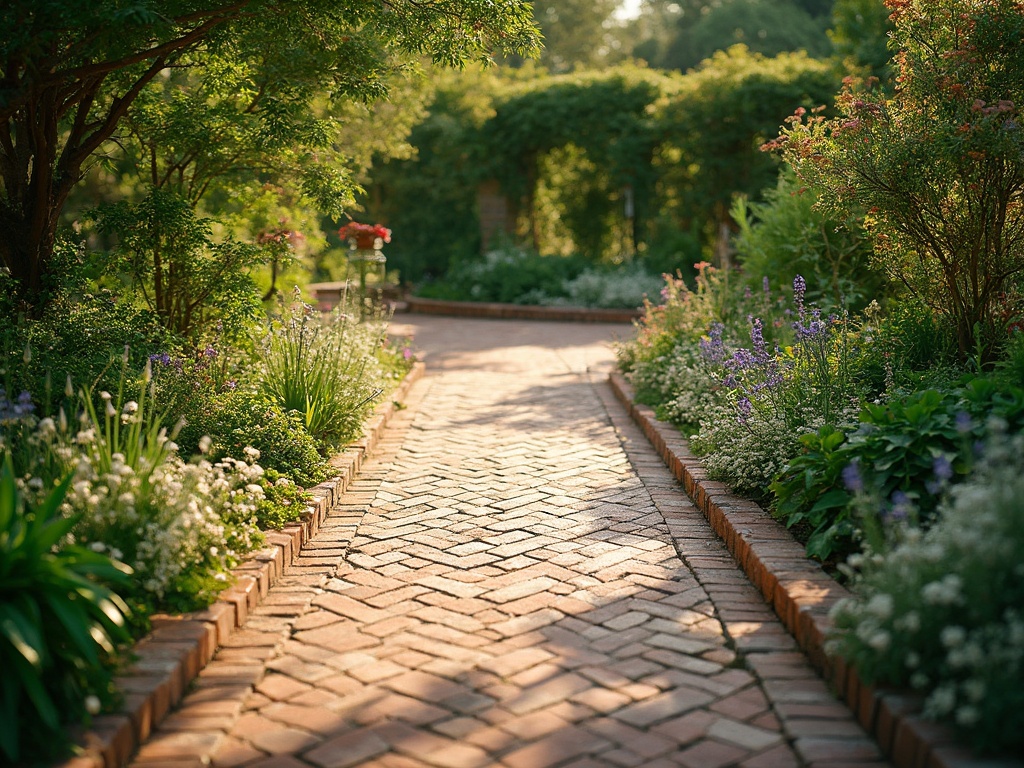
I love using the herringbone pattern for brick garden edging. It weaves together bricks in a zigzag style. It adds a touch of class and a dash of charm to any garden space. With this design, you don’t just get an edge; you get a statement piece that can really catch the eye. 🌿🌷
The trick to a perfect herringbone pattern is laying bricks at right angles. It reminds me of playing a life-sized game of Tetris in my garden. This fun and interactive process can be both challenging and satisfying. Once complete, it feels like a beautiful puzzle solved. 🌳🧩
I love the strong sense of style:
- 【 Zigzag magic 】🌸
- Can boost curb appeal 🌿
- Excellent for narrow paths or bold borders 🌻
Though it might seem a tad tricky, it’s worth the effort. It boasts durability and timeless beauty. It’s like inviting an elegant dance to your garden. Whether I’m planting flowers or vegetables, the herringbone finish adds flair and transforms my outdoor spaces. It’s a stellar choice. 🍅🐝
3) Brick and Gravel Combination
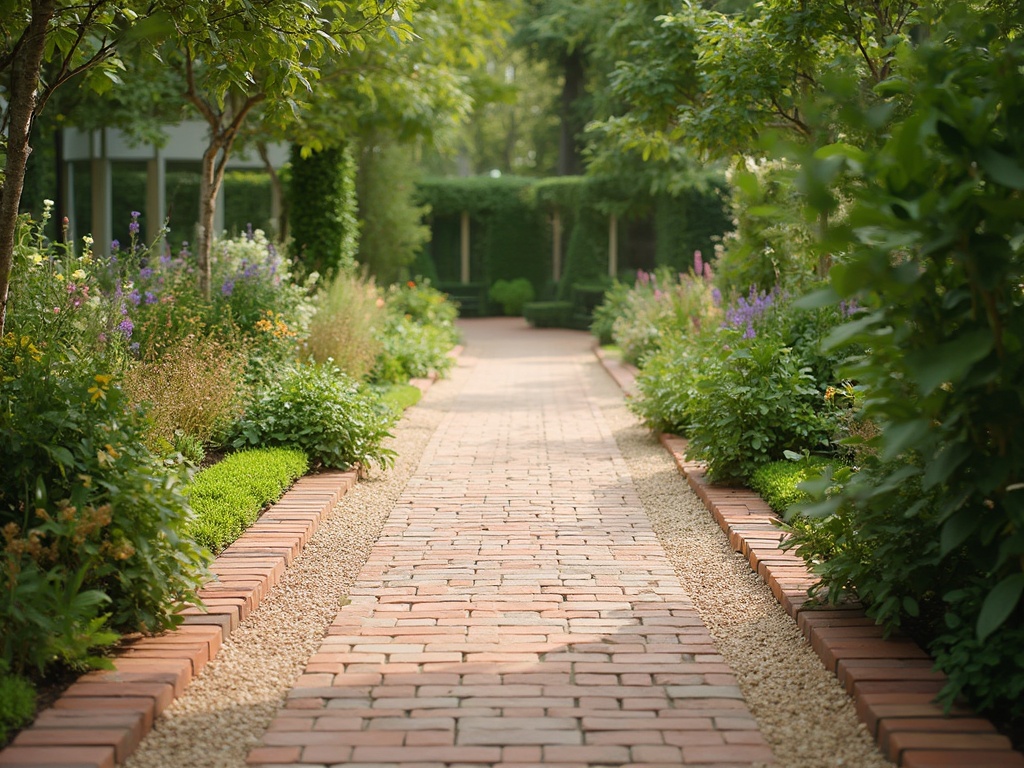
Combining brick and gravel in garden edging? It’s like pairing a fresh salad with a hearty soup—each has its role, yet together, they’re perfection. 🌱
Laying bricks provides a neat and organized border. Picture this: red bricks lined up smartly, giving your garden a polished look.
Behind the bricks, gravel fills in to add texture and color. It’s like those sprinkle toppings on ice cream—small but they elevate the whole experience.
Gravel helps with drainage, so plants don’t drown when it rains too hard. This combo works best for gardens on slopes or areas that collect water, turning a muddy mess into a stylish walkway.
On the sunny side, I’ve found that gravel naturally complements the warmth of brick. It creates a lovely contrast against vibrant green plants or colorful flowers. 🌸
Planting small succulents along the gravel can add some life to the area. Watching little cacti and flowering plants pop out through the gravel? It’s like nature’s artwork.
Remember, no need for a fancy install. Sometimes, it’s the simple things that bring the best results. Temperature shifts? No worries. This combo stands up to all seasons, just like my favorite pair of gardening gloves. 💚
4) Brick-on-Edge Finish
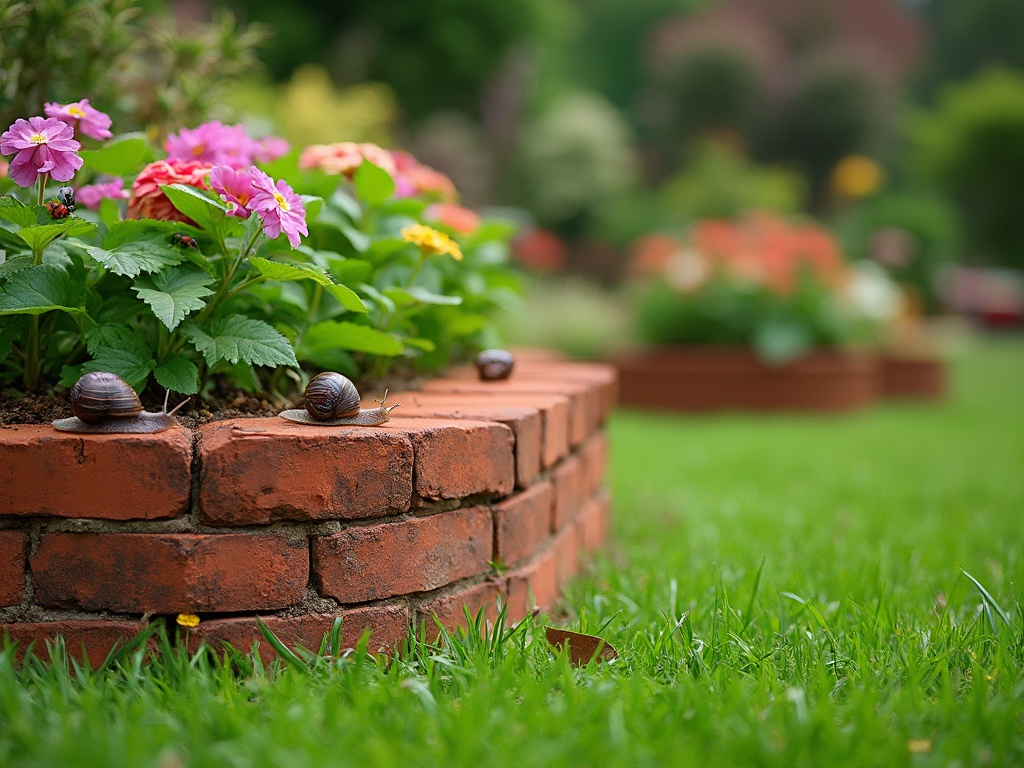
I love the look of the brick-on-edge finish. 🌷 It gives my garden a clean and classic look. To start with this style, I’ve found that setting bricks on their side adds height and interest to any border. It’s kind of like giving your garden a little facelift.
It’s not just about looks, though. When bricks are set on edge, they create a strong boundary. 🧱 This helps keep mulch and soil in place, which means less work for me. It also makes mowing easier since I don’t have to worry about grass sneaking into the garden beds.
I also like how this style lets me be a bit playful. Sometimes, I mix different shades of bricks to add some flair. 🎨 And truth be told, placing those bricks is a bit like a big game of Tetris. Once in place, the bricks become a perfect perch for little critters like snails or ladybugs. 🐌🐞
If you’re considering this style, you might want to try it in a smaller section of your garden first. It can be a fun weekend project with the family. Just remember to wear gloves to keep those hands happy! 🌿
5) Circle Brick Edging

Creating a circle brick edging is a fantastic way to add a touch of whimsy and charm to your garden. Seriously, we all know that gardens love curves as much as we do! 🌱 Curved lines can soften the space and create a focal point that draws the eye.
When starting, I like to find a central point and use a string tied to a stick as my simple compass. Keep the string taut while marking out your circle with chalk or spray paint. This keeps the circle… well, a circle! Imagine the possibilities: a cozy little nook or a feature around a mature tree 🌳.
Time to lay the bricks! Placing them snugly together around that perfect circle takes a bit of patience. To make the curve happen, I might have to cut a few corners—literally—with a masonry saw ✂️. Thankfully, that’s easier than it sounds!
To set everything firmly, I lay a bed of sand beneath the bricks. This gives stability and prevents any rogue bricks from making a break for freedom. 🐌 It’s like creating a giant puzzle, where every piece fits just right to make a beautiful garden border.
Circle brick edging isn’t just practical; it’s a chance to showcase your creative flair. Add plants that pop, and you’ve got a showstopper. Your garden will thank you, and trust me, it’ll be more huggable than ever! 🌸
6) Brick and Stone Mix
Mixing bricks and stones in your garden edging brings variety and interest. I love how it breaks up the monotony and adds a natural feel without being overwhelming. Imagine walking in my garden, seeing a line of mixed textures, each piece unique.
Using bricks and stones together gives flexibility in design. Bricks offer a neat, straight edge, while stones add shape and character. I often set stones at random intervals, like a splash of color in an artist’s painting.
- Enhance curb appeal. 🌳
- Adds natural elegance. 🌸
- Provides strong boundaries. 💚
Planning is key. I find it useful to lay out my pattern before starting. This way, I can see where each element fits best. Mixing larger stones with solid red bricks in random patterns gives it a whimsical touch, like jazz music for the eyes!
7) Reclaimed Brick Look
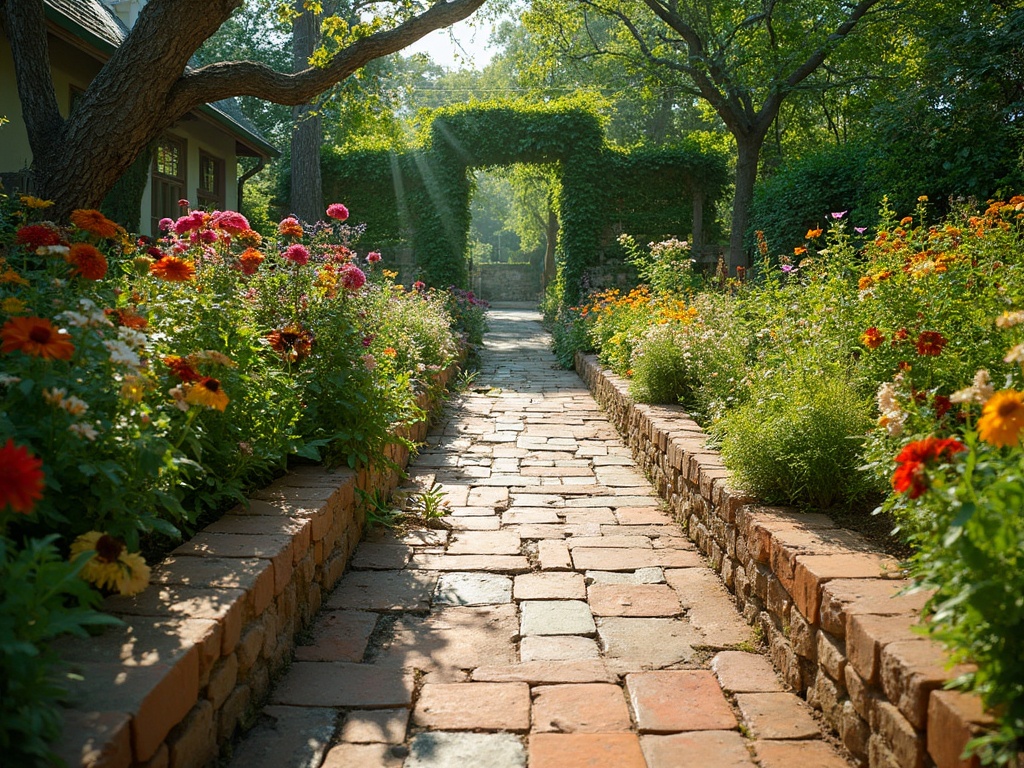
Using reclaimed bricks in the garden adds character and a bit of history to the landscape. I love this approach because it brings a rustic charm that’s hard to beat. The imperfections in old bricks tell stories of their own, making your garden truly unique 🌷.
Finding these bricks isn’t too tricky. You can often grab them for a steal at local salvage yards or online marketplaces. I once found a stash of them at an old building site—talk about a win! Just remember to clean them up a bit to highlight their beauty.
– Adds vintage charm 🌸
– Cost-effective compared to new bricks 💰
The installation process is similar to new bricks. Make sure the trenches are ready and the sand level is even. Then, lay the reclaimed beauties down. The aged look complements any garden design, be it modern or traditional 🌱.
Using reclaimed bricks not only saves money but also helps the environment, making it a popular choice for green-thumbed folks. As I see it, this choice adds soul to the garden, creating a space that’s both stylish and sustainable 🌳.
Staggered Brick Wall

Creating a staggered brick wall in my garden felt a bit like putting together a jigsaw puzzle, but without the missing pieces. Each brick fits snugly against its neighbor, forming a lovely pattern that adds depth🌳 and character to my outdoor space. I love how it looks both sturdy and stylish at the same time.
The staggered pattern gives a unique flair to the garden border. It’s like an artistic expression made with bricks; each layer offset from the one below. This not only makes the wall stand out visually but also adds extra stability, ensuring it withstands pesky weather changes. Plus, there’s something classic and timeless about bricks that I just can’t get enough of.
- Visual Appeal: Creates a zigzag effect.
- Stability: Offsets offer extra robustness.
- Longevity: Bricks age 🌸 gracefully.
Laying a staggered brick wall wasn’t rocket science, but it did require a bit of attention. I had to ensure each brick was aligned just so. Still, the end result was worth it. The wall became a backdrop for vibrant plants🥀 and a conversation starter with neighbors curious about my handiwork. An extra benefit? It keeps the flower beds neat🌷.
9) Brick and Wood Blend
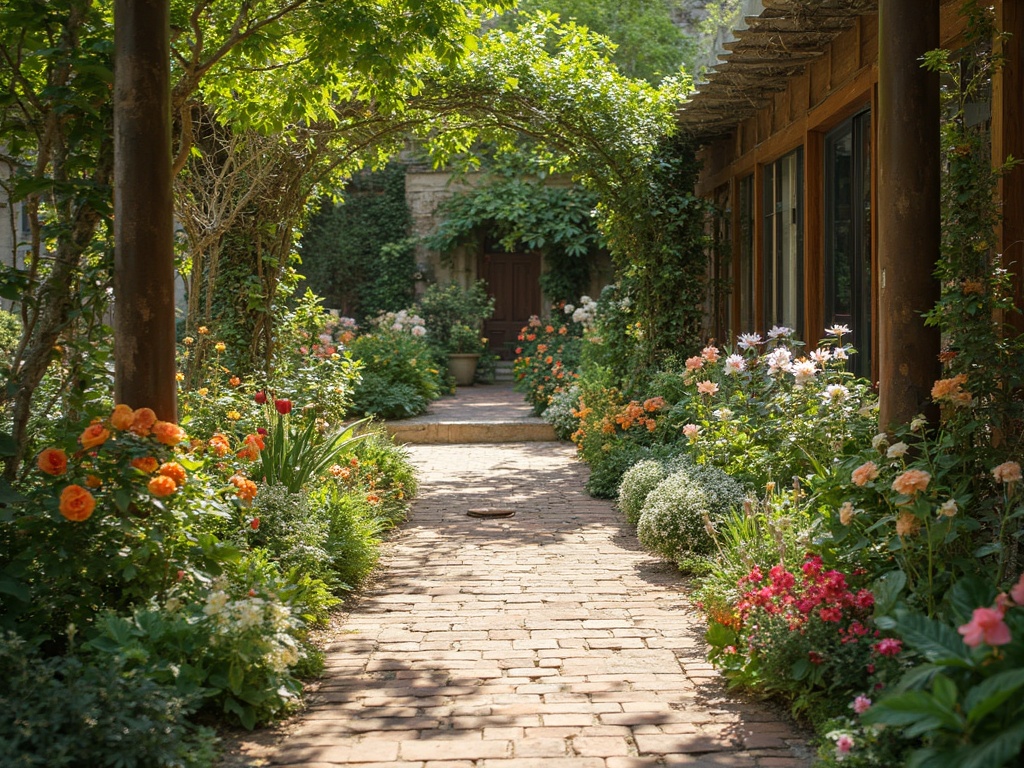
Mixing brick and wood in a garden creates a charming and rustic feel. Imagine wooden planks laid between brick borders. It’s like a garden’s version of peanut butter and jelly—unexpectedly delightful! 🌱
I once tried this blend in my backyard — rustic bricks paired with cedar wood slats. The contrast was stunning and added a natural warmth.
Why choose this mix?
- Durability: Bricks are tough as nails. Wood adds warmth.
- Style: The pairing offers a classic yet modern vibe.
- Creativity: It’s a chance to show off personal flair. 🌸
Bricks can form a solid base, while wood acts as a gentle accent. Whether staining the wood darker or allowing it to weather naturally, each choice offers a unique twist. 🍁
Tips for a perfect blend:
- Keep wood above soil to avoid rotting.
- Use water-resistant sealants on wood. 🪓
- Choose brick colors that complement wood tones.
Combining these materials offers varied textures and patterns to play with. It’s like adding a touch of nature’s art to your garden. 🌳
10) Raised Brick Bed
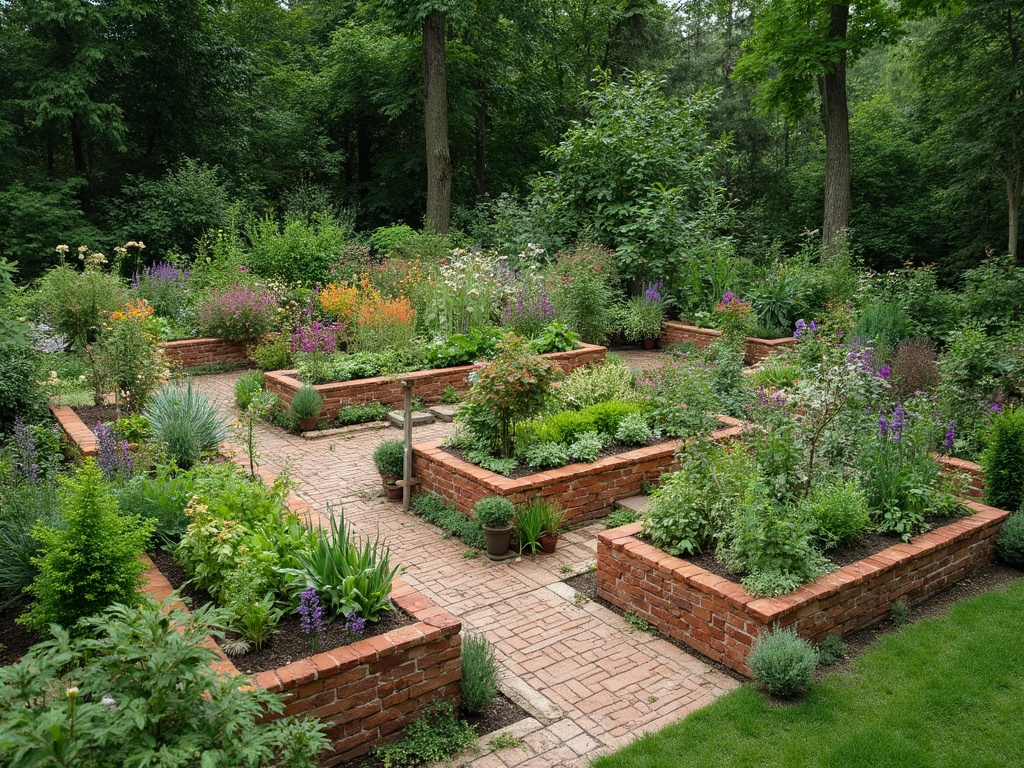
When I think of raised brick beds, I picture a garden with a touch of elegance and utility. Imagine bricks gently lifting your flower beds or vegetable plots like mini stages in your backyard.
These beds are not just about looks. They keep the soil in place and are easy to maintain. 🌷
Why go for raised brick beds? They make gardening easier by bringing your plants to a comfortable height. No more bending over like a pretzel!
You can sit or kneel beside them and work your magic with ease. 🐝
Raised beds are also good for drainage. Water moves smoothly through the soil, reducing the risk of soggy roots. If you’re adventurous, try using different brick colors to add some splash and style. 💚
You don’t need to be a pro to build one. Just stack the bricks like you’re playing a giant, outdoor game of Jenga—only with more stability!
Remember, a little sand at the base helps keep everything snug. Happy building! 🍅